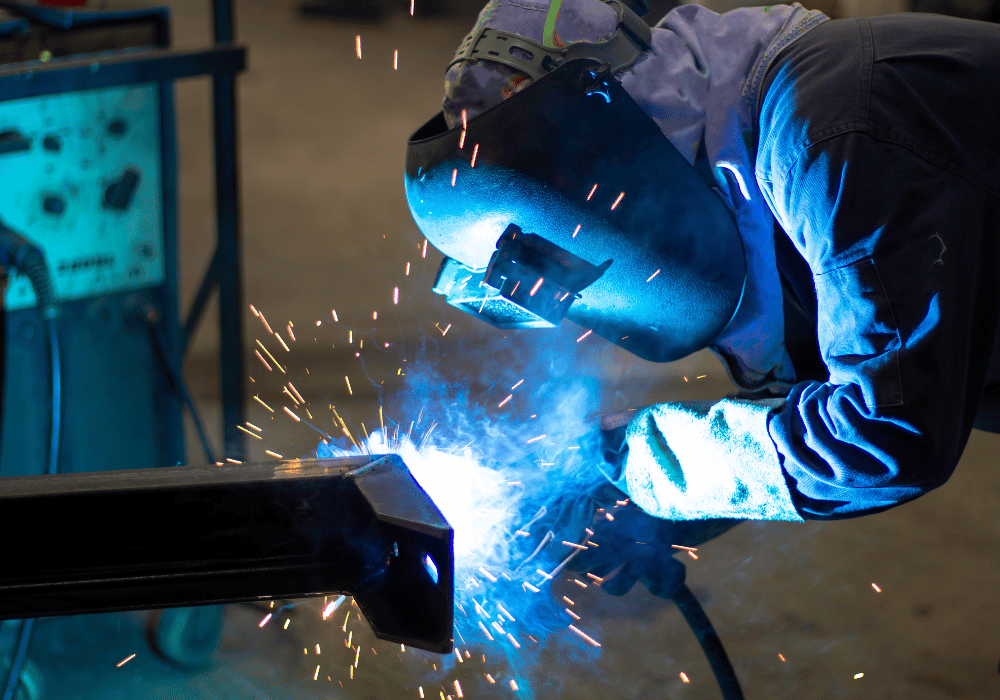
Building a reliable tooling strategy for complex 5‑axis work is part science, part stubbornness. People imagine five axes and think the machine solves the hard problems. The truth is that it simply exposes them faster. If your fixturing flexes, your tools chatter, or your offsets drift, the machine will carve those mistakes into your part from five directions. What follows is the approach I’ve refined in a busy machine shop that tackles aerospace brackets, medical housings, turbine components, and the odd piece of custom industrial equipment manufacturing. The patterns hold whether you are a small Machine shop proving out a prototype, a Machinery parts manufacturer hitting production numbers, or a Steel fabricator branching into cnc metal cutting to keep tight tolerances on welded assemblies.
Start with the finished part, not the stock
For 5‑axis, the part design and its datum scheme dictate every downstream decision. I start by modeling the finished part and a series of phantom coordinate frames that describe how the part wants to be held. I want three things answered before I think about end mills:
- Where does the part want to be located repeatably? That is your functional datum, not the convenient faces from the billet. How will the raw stock be introduced, machined, and re‑located so the functional datum is always recoverable? Think of this as the part’s journey through space. Which operations are directionally sensitive? Thin ribs cannot take side pressure, certain slots do not like climb forces, and ceramic‑coated cavities hate heat soak.
A good 5‑axis strategy minimizes compromises by aligning tool vectors with features that demand accuracy. On a medical impeller I ran last spring, the housing bore was the master. We cut it in the first operation, then probed it every time the part was re‑clamped, publishing a new local work offset off that bore. You do not need a million‑dollar industrial design company to tell you this, just discipline and a probing routine you trust.
Pick the right foundation: machine, spindle, and table
Not every 5‑axis machine is the same animal. Trunnion machines carry different sins than swivel heads. A trunnion with a centerline through the rotary axis makes radial features easy to hold, while a head‑head machine shines when you want the stock to sit flat on a table. Both can make good parts, but they ask for different tooling and fixturing.
Pay attention to spindle taper and torque curve. HSK spindles repeat length more consistently during heavy angular indexing, which matters when tools are long and you are chasing tenths across orientations. CAT/BT tapers are fine for many jobs, especially in steel fabrication, but watch pull‑stud condition and spindle growth under prolonged roughing. High‑torque, lower‑speed spindles are better for stainless and Inconel, while lighter, higher‑speed spindles eat aluminum and plastics without drama. A cnc metal fabrication cell with mix‑and‑match spindles will need distinct cutting data and tool families to avoid mid‑process surprises.
Fixture design that refuses to move
Fixturing is where most 5‑axis projects live or die. The fixture must present the part to the spindle so you can reach every critical surface without gymnastics, and it has to resist cutting forces from any direction. If it looks clever, I get suspicious. The best 5‑axis fixtures are stout, simple, and indexed.
A few recurring patterns work well:
- Tombstone or cube with standardized zero points. A zero‑point base plate with pull studs or ball locks lets you swing between setups and machines without re‑indicating. A contract manufacturing operation that shares fixtures between a 3‑axis rougher and a 5‑axis finisher can reclaim hours per week this way. Sandwich plates for thin parts. When you have to machine both sides of a thin aluminum lid, clamp it between matched plates with a gasket or wax assist. Machine the pocket through, then release without springing the part. I once made a food equipment lid that warped 0.020 inches when we clamped it traditionally. The sandwich method brought flatness within 0.002 across 12 inches. Rotary‑aware clamping. On trunnions, clamp bolts and clamps must clear the sweep of the table and the swing of the tool at extreme tilts. Model the entire envelope and use collision check. Better yet, print a paper silhouette and physically sweep the axes with an indicator to feel potential crashes. Sacrificial dovetails. A small dovetail on the raw stock feeds into a self‑centering vise. Machine everything you can, then snap off the dovetail in the second operation. Dovetails give a safer, lower‑profile clamping option than toe clamps that protrude into the cut.
For steel and titanium, the fixture needs mass and mechanical advantage. Do not rely solely on vacuum unless you are cutting shallow and light. A steel fabricator who adds machining to finish weldments will find hybrid fixtures useful: weld datum tabs and machined pads directly onto subassemblies so the machining setup is repeatable and quick.
Workholding sequence and datums you can re‑discover
Complex parts rarely finish in a single clamp. The trick is to declare one feature as the truth and keep returning to it. On turbine blisks we supported a decade ago for an industrial machinery manufacturing client, the bore and a triad of equally spaced pads served as the return home. Each operation began with a probe cycle of the bore and a quick touch on one pad, rebuilding the work offset with a rotation correction. It takes two minutes and saves hours of scrapped work.
Use in‑process datums that survive. If the part design does not provide a durable boss or hole early, create one intentionally. Machine a pilot bore or dowel pad in the first operation, keep it out of harm’s way, and feature it in every re‑clamp. Never rely only on stock edges or saw faces on a 5‑axis job; those lie when heat builds and the part relaxes.
Tooling families built for reach and stability
Tool catalogs love to show long, skinny cutters doing heroic work at 30 degrees. In practice, stability wins. Build a limited set of tool families that you trust, and reuse them across jobs so your feeds, speeds, and deflection assumptions improve with each part.
For three common material groups:
Aluminum and copper alloys. Keep tools short and stout. Variable‑helix, 3 or 4 flute end mills with high axial engagement make quick work. Opt for shrink‑fit or hydraulic holders when reach is moderate, and stubby ER collets for roughing. Coatings like ZrN and DLC help with built‑up edge on gummy alloys. I rarely go past 6x diameter in stick‑out unless I have to, and when I do, I drop step‑over and accept longer cycle time.
Stainless, titanium, and high‑temp alloys. This is where tool holding and coolant delivery carry the day. Choose 5 or 6 flute variable pitch tools for finishing, keep radial engagement under 15 percent, and prioritize consistent chip evacuation. Hydraulic or thermal shrink holders beat ER in runout and damping. If the feature allows it, consider indexable end mills for roughing to save cost per edge. Invest in through‑spindle coolant, even if you retrofit it; it is not optional on deep pockets.
Carbon and tool steels. Good HEM strategies with 4 to 5 flute variable pitch end mills work across the board, but watch hardness after heat treat. For 45 to 55 HRC, stick to coated carbide, clamp everything tight, and feed your way into corners with gentle arcs. Do not chase a mirror finish on surfaces that will later be ground. Use ball mills sparingly and only where the radius really matters.
When parts need deep reach with tight finishes, modular extension systems such as heat‑shrink pencils or tuned anti‑vibration holders make a difference. The extra cost pays for itself the first time your 10 inch reach finishing pass leaves the floor perfect at 0.0004 inch scallop without chatter marks.
Holders, runout, and length consistency
On 5‑axis, setup time hides in chasing length offsets and runout. Standardize. We maintain three holder tiers in the rack: hydraulic for finishing, shrink‑fit for reach or precision roughing, and collet for general roughing and drills. Each tier has color bands on the shanks and an expected runout limit, measured 1x diameter from the nose. Hydraulic and shrink normally hold below 0.0002 inch TIR with clean tooling. Collets drift toward 0.0005 to 0.001 if you are not careful, which is still fine for drills and roughers.
Length consistency matters when the spindle swings around the part. A tool that is 0.200 inch longer than its siblings can crash when the head tips to 110 degrees. Clamp lengths to a standard family when possible, or update your machine’s safe tool length parameters religiously. A simple spreadsheet with nominal lengths, minimum safe length, and maximum allowed saves expensive surprises. We store that chart at the machine and link it to the CAM templates.
Toolpaths that respect material and machine
True 5‑axis machining invites dramatic swarf cuts and morph cuts on blades and blisks, but conservative choices often win. Stock‑aware roughing with consistent engagement protects both tool and machine. Trichoidal or trochoidal motion clears corners without spikes in load. On slender features, align tool vectors to push into a supportive mass rather than away from it. Think of force direction like a welding company considers distortion: you cannot eliminate it, but you can steer it.
Surface finishes on compound curves depend more on tool axis control than flute count. A tilt of 10 to 15 degrees from normal can prevent the tool from rubbing at the tip of a ball end mill, reducing heat and improving finish. Set a consistent stepover based on cusp height rather than a fixed percentage of tool diameter. For a 10 mm ball on a critical aesthetic surface, a 0.02 to 0.04 mm cusp usually reads clean to the eye. Increase feed per tooth slightly when tilting more, because the effective chip thickness falls as the contact patch moves away from the tool apex.
Blend roughing and finishing passes so the final cut always sees uniform stock. If your final pass starts with 0.010 inch stock and then suddenly drives into 0.030 inch in a corner, chatter will appear, especially at high tilt. A light semi‑finish pass sets the table. On high‑value parts, run a verification pass on a scrap blank and inspect the stock map with a laser or touch probe before committing to finish.
The quiet art of deflection management
Chatter is a shape, not a sound. When a cutter pushes away, it bends, and that curved motion repeats. Break the loop. Do it with shorter stick‑out, lower radial engagement, higher axial engagement, and supportive toolpaths. If you feel tempted to turn up the feed rate to plow through chatter, stop and adjust the forcing function. Shift the spindle speed by a modest percentage to dodge a resonance lobe. Tighten every screw on the fixture. Swap to a different holder style with better damping. Many of our shop’s “miracle fixes” were not new tools, but slightly heavier holders or a 12 percent speed shift.
On 5‑axis finishing with ball mills, small changes in tool axis create big differences in stiffness. If a rib sings at 35 degrees tilt, try 25 or 45. The contact patch moves, runout reads differently, and the vibration mode changes. This is why model‑based tool axis strategies beat hand‑typed angles, especially near thin features.
Coolant, chips, and thermal honesty
Coolant is more than a faucet. Through‑spindle coolant at 300 to 1000 psi makes deep drilling and pocket clearing viable in stainless and titanium. In aluminum, it prevents welded chips on the edge and keeps micro‑burrs short. But more is not always better. On thin walls, flooding the area during a long finishing pass can thermal shock the part, and when the head angles, coolant can miss the cut completely. We often run a low, consistent coolant stream and a directed air‑oil mist to keep the tool lubricated while avoiding big temperature swings. In some die steels, air alone with a well‑polished tool face gives the best finish and least cracking.
Chip control deserves its own paragraph. Chips that ride back through the cut are dulling agents. Plan toolpaths with gravity and the machine’s kinematics in mind so chips fall away. Program retracts that lift the tool clear before indexing. If your 5‑axis has a washdown system, use it aggressively between cycles. The last thing a cnc metal cutting cell needs is chip slurry under a zero‑point pallet.
Probing as a process, not an apology
There is a bad habit in some shops that treats probing like a bandaid. Good probing is preventative medicine. Use it repeatedly, predictably, and sparingly in time. We probe stock size before roughing to adjust for saw variance. We probe a master bore or boss at each re‑clamp. We probe the tool length after major heat events or after hitting an unexpectedly hard spot. And we log the probe results so we can catch drift long before it cnc machining shop scrapes a part.
For a Machining manufacturer that runs mixed materials and small lots, process‑driven probing is what keeps scrap at bay. A 30‑second bore probe that updates G68 or a local rotation can save a $1,200 billet. Treat it as part of the cycle, not an exception.
Taming burrs and edges without wrecking tolerances
Complex 5‑axis parts accumulate burrs in odd corners. Blindly hitting them with a scotch‑brite wheel costs more than it saves. Deburr in the machine when possible. A small chamfer mill, ball end mill, or even a drag tool can take a controlled edge off critical corners. On medical housings we often specify a 0.005 inch edge break that the toolpath applies along break lines rather than leaving it to post‑machining handwork. In steel fabrication workflows where parts move from welding to machining and back, control the edge spec early so welders and machinists do not fight each other over fit‑ups.
Heat treat, stress, and the order of operations
Material moves when you release stress. If you rough a long spar in one clamp, then flip and finish, expect it to arc. Balance material removal by roughing in stages and flipping earlier. Leave symmetric stock on slender features so both sides relax evenly. For parts that will be heat treated mid‑process, plan generous finish stock, allow for scaling, and recut datums afterward. A custom metal fabrication job with mixed processes benefits from a simple traveler sheet that lists the expected growth or shrink after each thermal event. You do not need perfect numbers, just credible ranges so the next machinist knows what to probe and how much stock remains.
CAM templates that reflect your judgment
CAM gets blamed for sins that belong to process. Still, good CAM practice saves skull sweat. Build templates that encode your shop’s default choices: safe lead‑ins, minimum line lengths, smoothing tolerances, and retract policies around tilting moves. Include stable defaults for material groups, not just generic libraries. For example, default to climb cutting with feed per tooth appropriate to your spindle’s torque band, and lock maximum stepdown so the tool does not exceed its sweet spot when CAM sees extra stock in a corner.
We keep separate 5‑axis finishing templates for ball and barrel tools. Barrel cutters, sometimes called circle‑segment cutters, can leave beautiful finishes at much larger stepovers. They shine on large fillets and shallow sweeps. If you run them, invest time in accurate tool geometry definition and verify with a test patch. It is a good way for a Machine shop to win back hours when parts have large freeform surfaces.
Tool life management that respects reality
Tool life on complex 5‑axis parts is lumpy. One tool might live 30 minutes on one job and 6 on the next. Try to bring some order. Start with conservative tool life counters based on your worst case, not your best. Log actual time in cut, not just spindle on. Reset life when you change holders or stick‑out. Split the load: rough with cheaper inserts, finish with protected tools that never touch unknown stock. A Machinery parts manufacturer with repeat contracts should revisit life numbers every few lots. Over time, your library matures, and your operators trust the counters, which means they stop gambling.
Metrology that closes the loop
Good 5‑axis work finishes with inspection that informs the next cycle. In‑machine probing finds big errors, but CMMs or Industrial manufacturer scanners tell you about subtle shape drift across compound curves. You do not need every part on a granite plate. Pick the few check features that represent the whole: a bore’s roundness across tilts, a swept surface’s deviation, a relative position between two datums that change clamps. When a deviation shows a trend, act. Maybe a tool is dulling early, or a fixture pad is picking up chips and growing a tenth. We add small witness flats or holes to some parts solely for metrology to avoid touching functional surfaces with styli.
A short checklist for new complex 5‑axis work
- Define functional datums early and make them probe‑able in every clamp. Simulate full travel and collision, then dry run with the shortest tools first. Standardize tool families and holders, and lock stick‑out where possible. Build fixtures that are boring, heavy, and indexed. Cleverness is a red flag. Plan burr control and edge specs inside the program, not at the bench.
How this plays out in common shop scenarios
Aerospace bracket in 15‑5. Material shows workable toughness, bores matter more than cosmetics. Use a trunnion fixture with a pinned nest that references the master bore machined first. Rough with 5 flute variable pitch at 10 to 12 percent radial engagement, through‑spindle coolant on, and accept a few extra minutes of semi‑finishing to stabilize thin ribs. Probe bore each clamp. Expect to kiss off 0.006 to 0.010 in the final pass.
Medical impeller housing in 6061 with freeform internal cavity. Here, thermal stability and surface finish dominate. Choose a high‑speed spindle with hydraulic holders for finish tools. Finish with a ball or barrel tool tilting 10 to 15 degrees to move contact off the tool tip. Control cusp height, not stepover. Use mist plus light flood to avoid thermal shock. Deburr in machine with a small ball pass along edges so the post‑process does not roll burrs into the cavity.
Precision welded steel frame with machined datums. The welding company hands you a frame that is never perfect. Machine reference pads and holes on fiducials welded specifically for this purpose. Clamp by those, not by the tube edges. Expect 0.5 to 1.5 mm of cumulative distortion and build a probing routine that sets rotation and skew. Chip control is tough on open frames; use directed air, washdown, and pauses to clear stringers.
Small batch custom industrial equipment manufacturing components. Think scalability. Build universal fixtures with interchangeable nests keyed to a common base plate. Standardize tool libraries across the 3‑axis rougher and the 5‑axis finisher so tool numbers and lengths mean the same thing. Make probing automatic so weekend shifts do not improvise. Treat your CAM templates as products, not scratch pads.
The role of upstream collaboration
A Manufacturer who involves the Machine shop and Industrial design company early reduces heroic machining later. Simple design shifts pay large dividends: adding a 3 mm relief radius to a pocket corner, increasing wall thickness by 0.5 mm, or allowing a small witness flat for fixturing. If the design is fixed, push for material condition specs that acknowledge machining realities. A Machining manufacturer that feeds this feedback upstream becomes more than a vendor; it becomes a problem solver.
Economics that make sense
Complex 5‑axis jobs reward front‑loaded effort. A half day on fixturing and templates can save days down the road. Tooling spend is similar. Paying for hydraulic holders and a handful of tuned extensions may shorten cycle time modestly, but it dramatically reduces variation, which is where profit leaks. In contract manufacturing, predictable variation trumps theoretical speed. Customers care less about the last minute shaved off a cycle and more about every part arriving inside tolerance without drama.
Tool reuse is another lever. If you can cut 60 percent of your parts with the same 20 tools, you simplify life. The rest can be specials, but keep them quarantined in their own holder bins, labeled with stick‑out, last used material, and known pitfalls. An organized crib turns a chaotic cnc metal fabrication floor into a system that even new operators can run.
A final word on judgment
There are plenty of recipes for feeds, speeds, and beautiful CAM screenshots. What separates consistent 5‑axis output from noise is judgment exercised in the right places: where to hold and re‑hold, how to define the truth of the part, which forces you can allow and which you must avoid, and when to slow down to protect the finish. Most of this judgment comes from paying attention to the evidence your parts give you, then folding that back into your fixtures, your libraries, and your process sheets.
A Machine shop that builds this habit becomes a quiet force. Whether you hang your shingle as a Machining manufacturer, a Steel fabricator expanding beyond welding, or a broader Manufacturer serving multiple industries, the same tooling strategies play through. Keep your fixtures honest, your tools stable, your datums recoverable, and your coolant smart. The five axes will do the rest.
Waycon Manufacturing Ltd
275 Waterloo Ave, Penticton, BC V2A 7N1
(250) 492-7718
FCM3+36 Penticton, British Columbia
Manufacturer, Industrial design company, Machine shop, Machinery parts manufacturer, Machining manufacturer, Steel fabricator
Since 1987, Waycon Manufacturing has been a trusted Canadian partner in OEM manufacturing and custom metal fabrication. Proudly Canadian-owned and operated, we specialize in delivering high-performance, Canadian-made solutions for industrial clients. Our turnkey approach includes engineering support, CNC machining, fabrication, finishing, and assembly—all handled in-house. This full-service model allows us to deliver seamless, start-to-finish manufacturing experiences for every project.